
This is the second part of my post serie. In this post serie i would like to share my experience with custom list forms in SharePoint 2010 and 2013. Normally you start a visual studio solution with a list definition and a list instance. These posts will show you step by step to add a custom list form which will work fine even with code behind.
Part 1: Setting up a solution with a list definition, a list instance and deploy it.
Part 2: Creating a custom list form and connect it with the list definition.
Part 3: Necessary settings for custom listform in Visual Studio
In the last post we discovered some basics. Creating list definition and list instance and deploy it without modification. Now we are going to modificate the display form. We simple want to have a custom header in it.
I personally do the same as described in Ingo Karstein’s post or the post of bamboo solutions. Thanks to them for writing such nice instructions.
Step 1: Get the display form contents
Ok, open SharePoint Designer, go to your list and open the form section. Open the dispform.aspx page and copy the whole content to your clipboard or notepad.
Now remove everything between <WebPartPages:WebPartZone runat=”server” FrameType=”None” ID=”Main” Title=”loc:Main”><ZoneTemplate> and </ZoneTemplate></WebPartPages:WebPartZone>
This part will be created automatically afterwords.
Remove also the Page tag of this page: <%@ Page language=”C#” MasterPageFile=”~masterurl/default.master” Inherits=”Microsoft.SharePoint.WebPartPages.WebPartPage,Microsoft.SharePoint,Version=14.0.0.0,Culture=neutral,PublicKeyToken=71e9bce111e9429c” meta:webpartpageexpansion=”full” meta:progid=”SharePoint.WebPartPage.Document” %>
Step 2: Create an application page
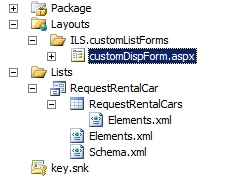
First we add an application page to the _layouts folder of our project. We name it customDispForm.

Step 3: Move it to your list folder
Move your application page in the same folder like your schema.xml file (in this case it is the list definition of RequestRentalCar)

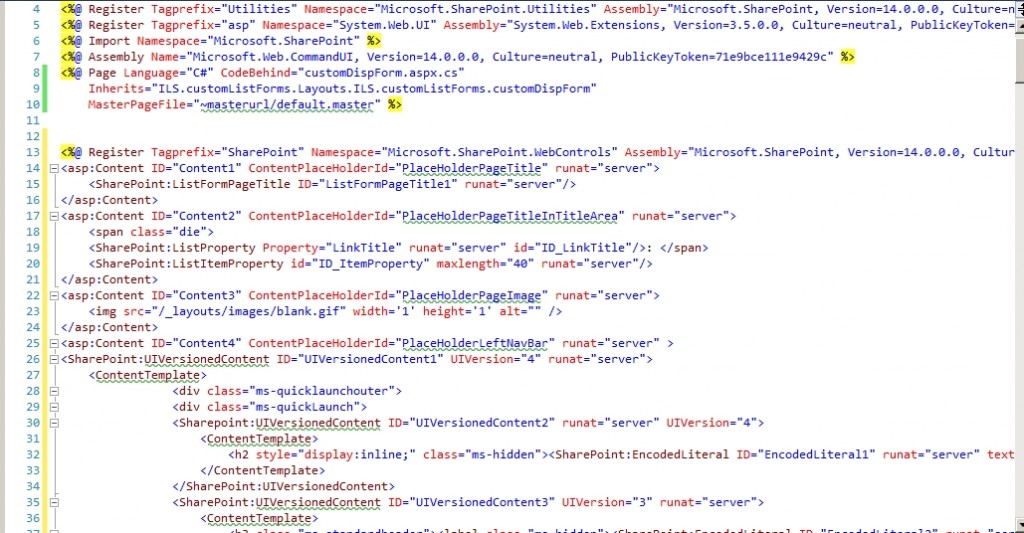
Now we have to make some modifications:
- Remove all Content Placeholders
- Remove the autoeventwireup attribute
- Change DynamicMasterPageFile to MasterPageFile.
- Change DeploymentType from TemplateFile to ElementFile in the property window of your customDispForm.aspx
- In customDispForm.aspx.cs file and change the inheritance from LayoutsPageBase to WebPartPage

If the line <%@ Assembly Name=”$SharePoint.Project.AssemblyFullName$” %> is underlined with a blue line, it doesn’t matter. you can simply close and reopen your solution and it will go away.
Step 4: Add original display form contents
Now we paste the contents from clipboard or notepad into that.
Step 5: Add header
Now we add a header Text so that we can see whether our customization works.
I put the heading before the webpartzone starts
<h1>..:: I Like SharePoint ::..</h1>
<WebPartPages:WebPartZone runat=”server” FrameType=”None” ID=”Main” Title=”loc:Main”><ZoneTemplate>
Step 6: Connect your custom dispform with list schema / list definition
Our final step: Now we have to tell our list definition, that it should use our custom display form.
Open the schema.xml file. Look for this paragraph:
<Forms>
<Form Type=”DisplayForm” Url=”DispForm.aspx” SetupPath=”pages\form.aspx” WebPartZoneID=”Main” />
<Form Type=”EditForm” Url=”EditForm.aspx” SetupPath=”pages\form.aspx” WebPartZoneID=”Main” />
<Form Type=”NewForm” Url=”NewForm.aspx” SetupPath=”pages\form.aspx” WebPartZoneID=”Main” />
</Forms>
In this we change the first line to the following:
<Form Type=”DisplayForm” Url=”DispForm.aspx” SetupPath=”features\$SharePoint.Feature.DeploymentPath$\RequestRentalCar\customDispForm.aspx” WebPartZoneID=”Main” />
If you now try to deploy your custom list form project, you might receive this error:

To avoid getting this error, you have to open the spprojectitem.spdata. Click on this icon in visual studio:
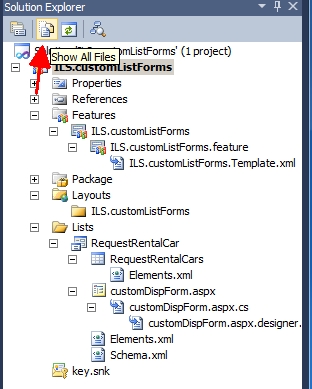
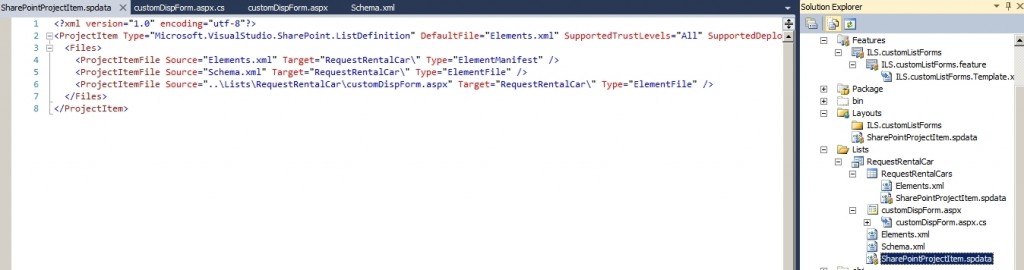
Then open the SharePointProjectItem.spdata file of your List definition (RequestRentalCar) and make sure, that the line of your custom form page looks like this:
<ProjectItemFile Source=”customDispForm.aspx” Target=”RequestRentalCar\” Type=”ElementFile” />
It normally looks like that:
Step 7: Deploy
Now let’s see results – how our custom display form looks like:
Tada…
Ok, that was the way like the both posts i mentioned above do the trick. It’s working now, why we would need a third part of this post serie? Well, read it or you’ll find it out some later this day 🙂 Go to Part 3
..:: I Like SharePoint ::..
Hi Karsten,
while you presented a working solution which would have been the only way in SharePoint 2010, there is a whole new possibility in 2013: Client Side Rendering. It’s completely driven by JavaScript and can be applied to any list – even to an already created one. It can be applied to a list’s view or to any list form. It can be applied to only one field or to the whole form or view.
Unfortunately the documentation is still very poor and it needs lots of searching to learn about it 🙁
Many greetings
Andi
Hi Andi,
you’re totally right – the client side is another approach which i didn’t cover in the post serie. But maybe i will do in future. If you find some good resources or write yourself about it, please let me know. Customizing the form of a list can be achieved with several options – as you mentioned the client side (there you can differ between the javascript or you use XSLT, with visual studio or even infopath is an option. Each option has its advantages and disadvantages, maybe we need a post about when to use which option or do you know a post which cover this subject?
Kind regards
Karsten
I have a error:
Unknown server tag ‘WebPartPages:WebPartZone’
Parser Error
Description: An error occurred during the parsing of a resource required to service this request. Please review the following specific parse error details and modify your source file appropriately.
Parser Error Message: Unknown server tag ‘WebPartPages:WebPartZone’.
Source Error:
Line 48:
On my VisualStudio (2012) I have a warning:
Warning 29 Unrecognized tag prefix or device filter ‘WebPartPages’.
Do I missed someting?
Note: I use Sharepoint 2013
Thanks
Do you have registered the Tagprefix WebPartPages in your aspx page?
have a look at the third part https://www.ilikesharepoint.de/2013/11/sharepoint-create-custom-list-forms-with-visual-studio-part-3/
OK, It’s fixed…
I add a tag Register:
Tagprefix = “WebPartPages”
Namespace = “Microsoft.SharePoint.WebPartPages”
Assembly = “Microsoft.SharePoint, Version=15.0.0.0, Culture=neutral,
…
cool thanks for your feedback i really appreciate it! You should also look at this post where i am doing it with rendering templates https://www.ilikesharepoint.de/2014/07/sharepoint-how-to-create-aspx-forms-spforms/ i think this is one of the best options to customize forms via code
you saved my day
hello,
i did the same way but getting File not found error when i set it to the .
One thing here is current ly my custom page does not have any thing.it is just a plane ascx file .i hav removed all content place holder.
but error is not about the content it is not able to find the file.
please let me know if you have any solution.
Br,
Manas