There are a plenty ways of building some cool listviews and look at your data – it’s a powerful report builder if you know how to use it and also use all opportunities you have. In my last posts i wrote about conditional formatting. Today i would like to show you how to build a view for a certain month. In this example we build a view for the last month. So we would like to see every item where the last month is mentioned in the date column we created (CreateDate).
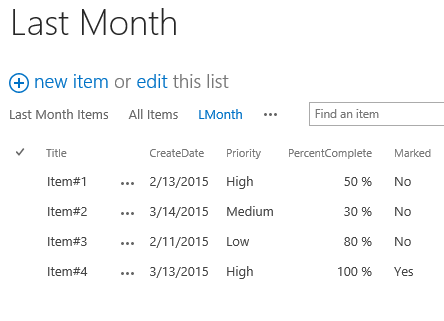
How would it look like? Ok let’s assume we have March 2015 and we would like to see all items from february 2015. That is our list.
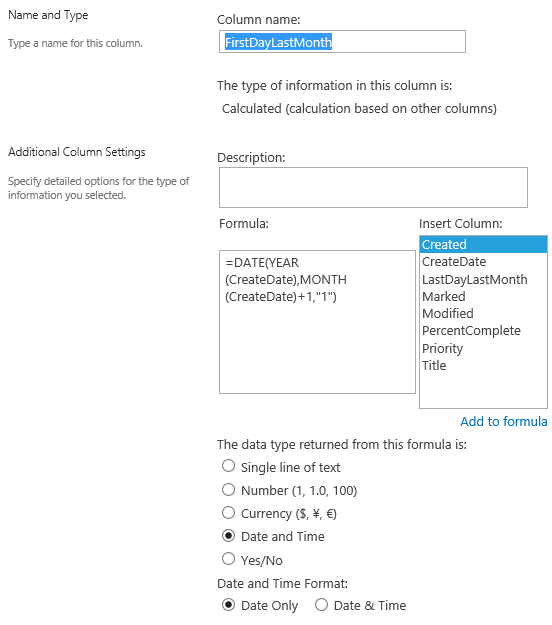
Column 1 -> FirstDayLastMonth
At frist we create a c column as calculated with the following Formula:
=DATE(YEAR(CreateDate),MONTH(CreateDate)+1,”1″)
Return Type: Date & Time, but Date only
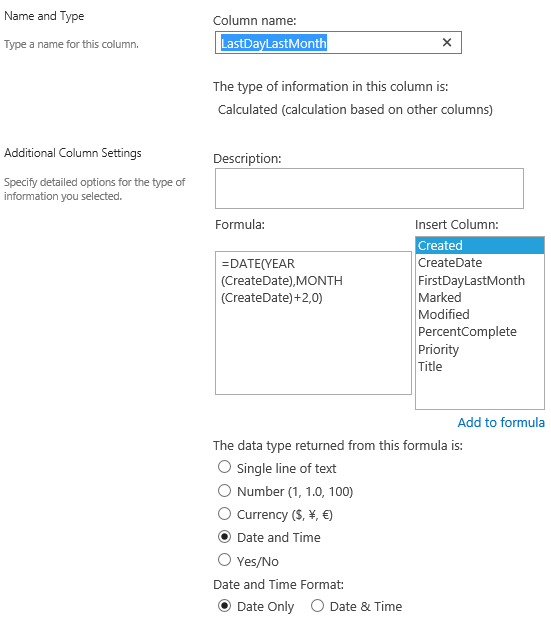
Column 2 -> LastDayLastMonth
Now we create another calculated column with this Formula:
=DATE(YEAR(CreateDate),MONTH(CreateDate)+2,0)
Return Type: Date & Time, but Date only
Edit your view:
In our view we check the following conditions:
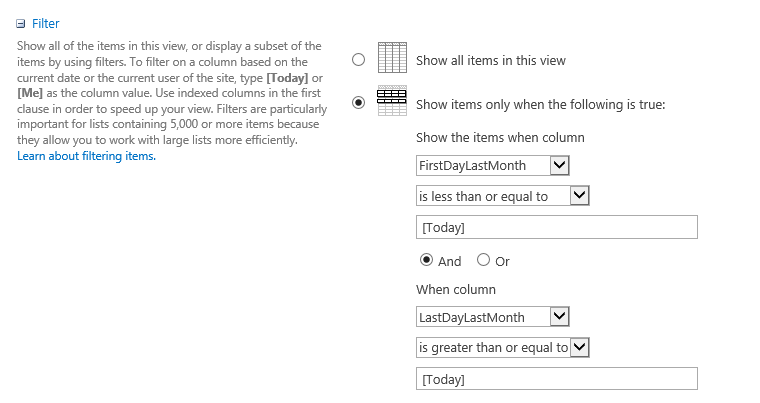
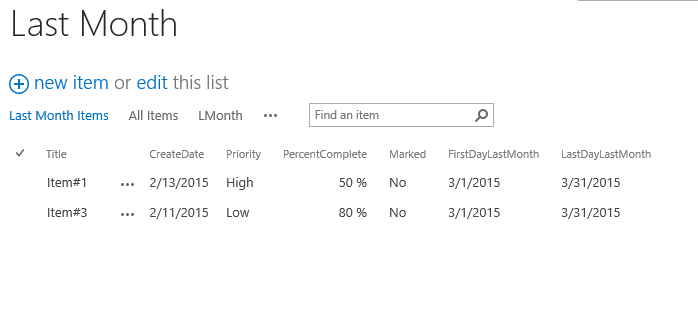
Result now filters all items for the last month, in this case it displays only items where the February is in the column CreateDate
That’s really easy right?
Hi all,
this really IS easy, but please be aware, that for german installations the commas within the formular have to be replaced by semicolons.
Cheers
Ingo
Dear Ingo, thanks for the hint, you’re totally right!