In this part i explain how to deploy and set a custom master page as feature. If the feature is activated, your custom master page will be added as custom masterpage for the site. Often this is needed if you want to deploy your corporate design or layout to all sites. But at first we need the feature for the master page.
Step 1: Create an empty Visual Studio Solution
Step 2: Add a module called “myCustomMaster”

As you can see i added the modul and i added to this module my prepared custom masterpage. In the Elements.xml file i also added some properties:
RootWebOnly = “true”
List=”116″
Url=”_catalogs/masterpage”
and for the file itself the URL and the type=”GostableInLibrary” attributes.
Step 3: Add a feature Event Receiver

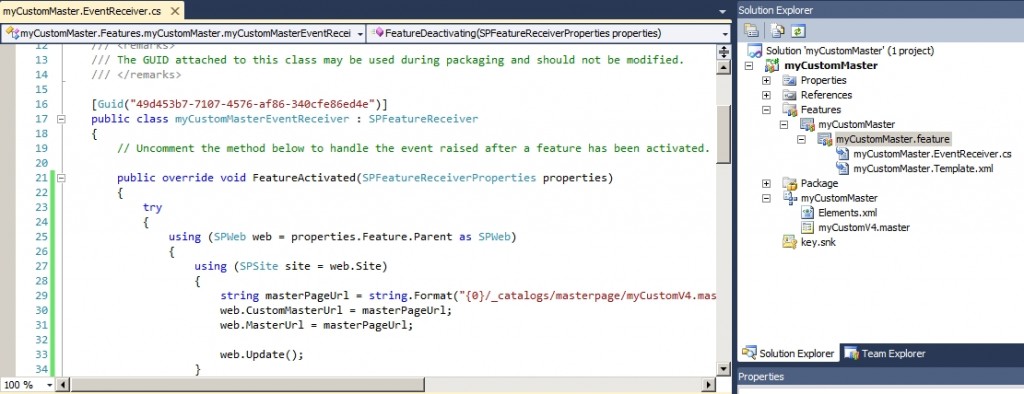
In the features i renamed my feature and added an Event Receiver. This receiver handles the activation and deactivation events. In the Activation i use this code:
[sourcecode language=”csharp”]
try
{
using (SPWeb web = properties.Feature.Parent as SPWeb)
{
using (SPSite site = web.Site)
{
string webUrl = web.ServerRelativeUrl;
if(!webUrl.EndsWith(“/”))
webUrl += “/”;
string masterPageUrl = string.Format(“{0}_catalogs/masterpage/TenneTLayoutV4.master”, webUrl);
web.CustomMasterUrl = masterPageUrl;
web.MasterUrl = masterPageUrl;
web.Update();
}
}
}
catch (Exception ex)
{
string errorMessage = string.Format(“Error at activation of feature: {0}”, ex.Message);
throw new SPException(errorMessage);
}
[/sourcecode]
And in the deactivation use this code:
[sourcecode language=”csharp”]
try
{
using (SPWeb web = properties.Feature.Parent as SPWeb)
{
using (SPSite site = web.Site)
{
string masterPageUrl = string.Format(“{0}/_catalogs/masterpage/v4.master”, site.ServerRelativeUrl.Replace(“//”, “/”));
web.CustomMasterUrl = masterPageUrl;
web.MasterUrl = masterPageUrl;
web.Update();
}
}
}
catch (Exception ex)
{
string errorMessage = string.Format(“Error at activation of feature: {0}”, ex.Message);
throw new SPException(errorMessage);
}
[/sourcecode]
These code snippets are responsible that your site uses the custom masterpage respective at deactivation time the normal v4 masterpage.
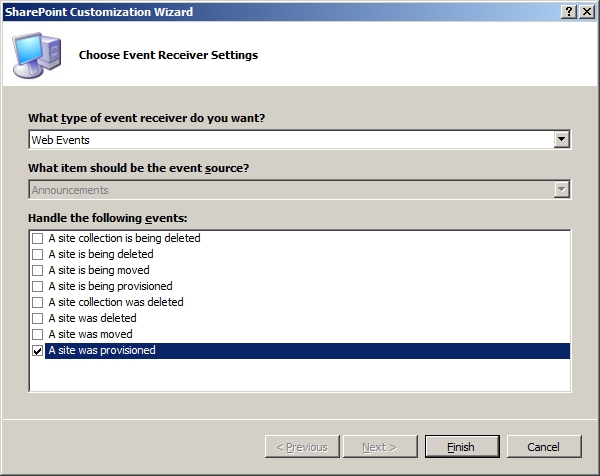
Step 4: Add a Event Receiver to your project called “ChildSites”

Now we add an Event Receiver to your project (not a feature event receiver). It should react if a site was provisioned.

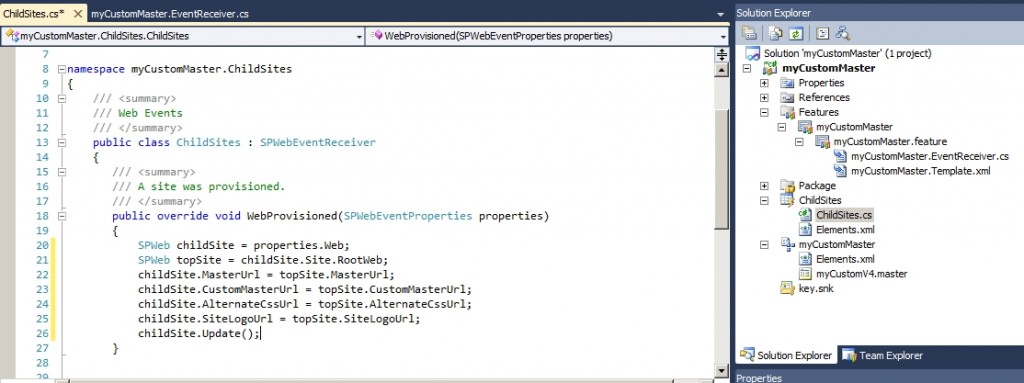
The code is like this one: It tells the subsite to use the masterpage and everything else from the topsite.
[sourcecode language=”csharp”]
SPWeb childSite = properties.Web;
SPWeb topSite = childSite.Site.RootWeb;
childSite.MasterUrl = topSite.MasterUrl;
childSite.CustomMasterUrl = topSite.CustomMasterUrl;
childSite.AlternateCssUrl = topSite.AlternateCssUrl;
childSite.SiteLogoUrl = topSite.SiteLogoUrl;
childSite.Update();
[/sourcecode]
Step 5: Deploy it
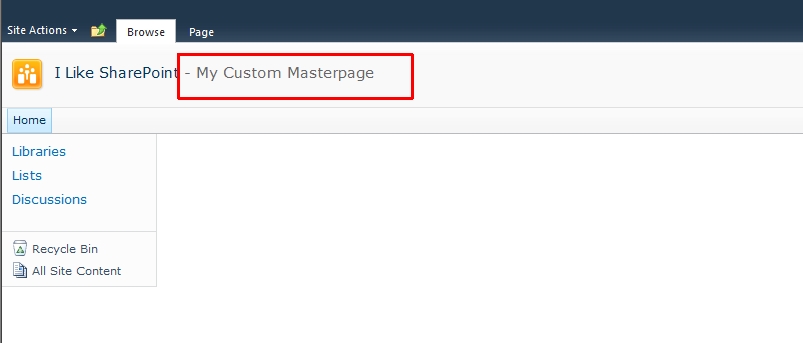
In my masterpage i simply added the text “- My Custom Masterpage” into the Ribbon. Just to illustrate that it works:

That’s it. Now your custom masterpage is deployed and will be used if you activate the feature. That’s really cool because it also uses this custom masterpage if you create a subsite.
Set custom MasterPage if a new site collection is created
But: What if you create a new site collection? Well, i can tell you, your feature will not be activated automatically. So each time you create a new site collection, you have to go to your site and activate the feature. That’s not what you would like to do especially if you’re creating many site or using self service site creation. In order to activate this feature at the time a new site collection is created you can use the feature stapling. How you have to setup your project, i will explain in my next post which will be available next Saturday.
..:: I LIKE SHAREPOINT ::..
Leave a Reply
You must be logged in to post a comment.