Ever wanted to create your own custom site definition? It’s pretty cool, if you can choose your own template at the time you create a site collection at the central administration. What can you by using a solution with a custom site definition?
Well, at first you can define fields, content types, lists, libraries and webparts which should be available after site is created. Of course, what was important for me, was the possibility to change the default.aspx page which is the starting point. At the default.aspx which is the entry point of each site collection you can place webparts, text, images, etc.
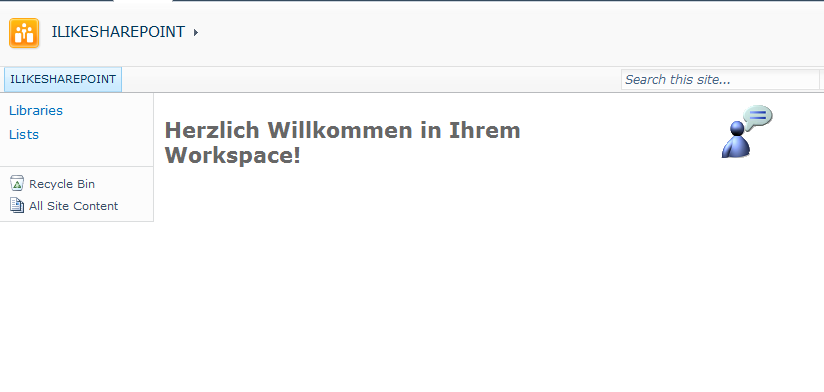
So if you are creating your own site definition don’t leave it blank. Use an image and a welcome text. Maybe you can provide a small intoduction into this workspace and necessary contact information if the user needs help. Useful links might be also interesting. Your user should have a good feeling when starting with SharePoint. My desired solution should have a custom image and a welcome text.
Ok, that’s enough explanation. Let’s go into the details.
At first you create a new Visual Studio project and choose as template the site definition. After that your project contains an area with three elements. The onet.xml, the webtemp_mySitedefinition.xml and the default.aspx. So let’s have a look at the webtemp_mySitedefinition.xml file.
[sourcecode language=”csharp”]
//webtemp_mySitedefinition.xml
< ?xml version="1.0" encoding="utf-8"?>
[/sourcecode]
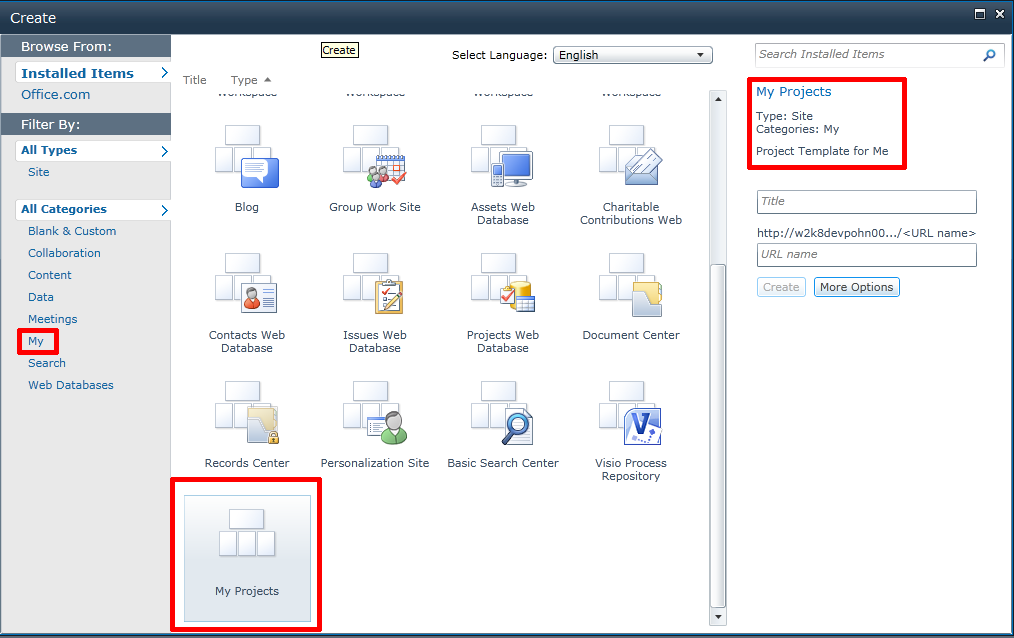
At first we set a template name and an ID. We set a configuration ID and a title. That’s it for this time. This definition makes that you have a title and a description and a category if you choose the template for subsite like the screen makes it clear.
After that we should look at the onet.xml file. There is a little bit more logic in it. At first you have to define the project definition, the navbars and then the configuration.
Navbars: In this section you can define which links in the quicklaunch or the top menu should be displayed by default.
Configuration: You can setup several configurations. In each configuration you can define lists, features and the default page. Each Configuration has an ID.
Lists: In this section you can define which lists should be available, for example if you defined your own list schema.
Web and Site features: These are the features which should be activated by default. So I recommend to use some standard features, so that your site provides the templates to create new lists (task, etc.)
Build up the Default.aspx or Homepage
Modules: This is interesting. You define a module name, and later on we define what should happen. So as you can see we add a file default.aspx. After that we open the tag all users webpart and can define the whole page content, like pictures, welcome text and so on. The basics, of course, is the default.aspx page, but here we put the content of the default.aspx page.
Update: DO NOT DELETE <navbar Name=”SharePoint Top Navbar” ID=”1002″></navbar> from Navbars!!!
[sourcecode language=”csharp”]
//onet.xml
< ?xml version="1.0" encoding="utf-8"?>
< ![CDATA[
&amp;amp;amp;amp;amp;amp;amp;amp;amp;amp;lt;h1 class=&amp;amp;amp;amp;amp;amp;amp;amp;amp;amp;quot;ms-rteElement-H1&amp;amp;amp;amp;amp;amp;amp;amp;amp;amp;quot;&amp;amp;amp;amp;amp;amp;amp;amp;amp;amp;gt;Herzlich Willkommen in Ihrem Workspace!&amp;amp;amp;amp;amp;amp;amp;amp;amp;amp;lt;/h1&amp;amp;amp;amp;amp;amp;amp;amp;amp;amp;gt;
]]>
< ![CDATA[
]]>
[/sourcecode]
That’s about the definitions, now we build up the template for the default aspx page. You can just copy and paste it, we define a table with two columns. Each column has a webpart zone.
[sourcecode language=”csharp”]
//default.aspx
< %@ Page language="C#" MasterPageFile="~masterurl/default.master" Inherits="Microsoft.SharePoint.WebPartPages.WebPartPage,Microsoft.SharePoint,Version=14.0.0.0,Culture=neutral,PublicKeyToken=71e9bce111e9429c" %>
< %@ Register Tagprefix="SharePoint" Namespace="Microsoft.SharePoint.WebControls" Assembly="Microsoft.SharePoint, Version=14.0.0.0, Culture=neutral, PublicKeyToken=71e9bce111e9429c" %>
< %@ Register Tagprefix="Utilities" Namespace="Microsoft.SharePoint.Utilities" Assembly="Microsoft.SharePoint, Version=14.0.0.0, Culture=neutral, PublicKeyToken=71e9bce111e9429c" %>
< %@ Register Tagprefix="asp" Namespace="System.Web.UI" Assembly="System.Web.Extensions, Version=3.5.0.0, Culture=neutral, PublicKeyToken=31bf3856ad364e35" %>
< %@ Register Tagprefix="WebPartPages" Namespace="Microsoft.SharePoint.WebPartPages" Assembly="Microsoft.SharePoint, Version=14.0.0.0, Culture=neutral, PublicKeyToken=71e9bce111e9429c" %>
< %@ Import Namespace="Microsoft.SharePoint" %>
< %@ Import Namespace="Microsoft.SharePoint.ApplicationPages" %>
< %@ Assembly Name="Microsoft.Web.CommandUI, Version=14.0.0.0, Culture=neutral, PublicKeyToken=71e9bce111e9429c" %>
|
|
|
[/sourcecode]
[sourcecode language=”csharp”]
After deployment you can choose your template if you create a subsite in your site collection and you can choose the template if you’re creating a site collection in the central administration.
[/sourcecode]
Choose:

After you created a subsite or a new site collection, you will see a site page like this:

..:: I LIKE SHAREPOINT ::..
Leave a Reply
You must be logged in to post a comment.